
CoolAuthorBox is the Best Author Info Plugin for WordPress that displays an author box to your theme sidebar / widget area or in a single post with social media links.
This plugin can display author info in two ways. One is a widget and the other is in a single post. This is an excellent plugin to display author image/avatar, name, title, biography, email, website, social links and more.
Here in this section, we’re going to show you how to download and install the CoolAuthorBox plugin. The process below is shown for both free and paid versions.
Install and Configure the Free Version
You can easily get the free version of this plugin to test and use on your site. For that, you need to install and activate it on your WordPress.
And the process to install and activate CoolAuthorBox is similar to any other WordPress plugin.
So, please follow these steps to easily do so.
Step 1: Install the Plugin
First, you’ve to log in to your WordPress dashboard. After that, go to the Plugins section. Then, you need to click on the Add New option there.
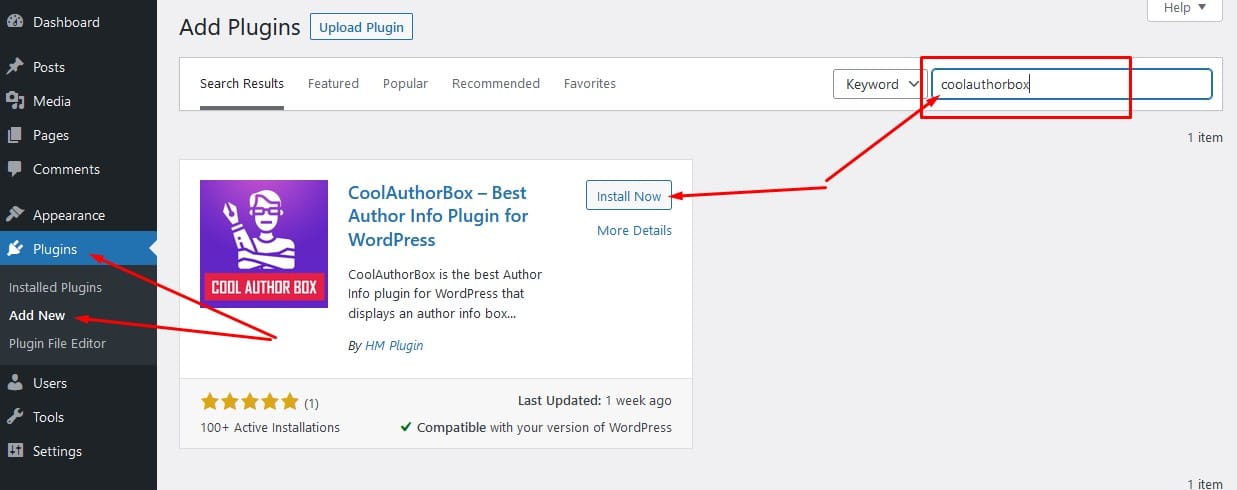
On this page, there’s a search box on the top right side. There, you must type the keyword ‘coolauthorbox ’ and click enter to search this plugin.
In just a few moments, you can see the search results. So, you can also find the ‘CoolAuthorBox’ plugin here. On this plugin, click on the Install Now button for installing it on your dashboard.
Step 2: Activate the Plugin
After the installation completes, the Install Now button gets replaced by the Activate button. So, you can click on the Activate button now.
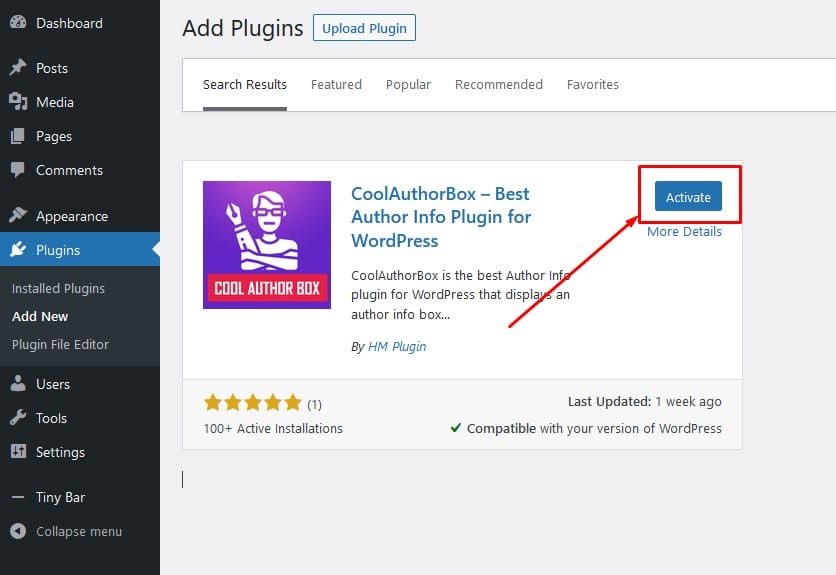
By doing this, CoolAuthorBox gets activated on your WordPress site. And you can find a new menu added on your dashboard i.e. ‘Cool Author Box’.
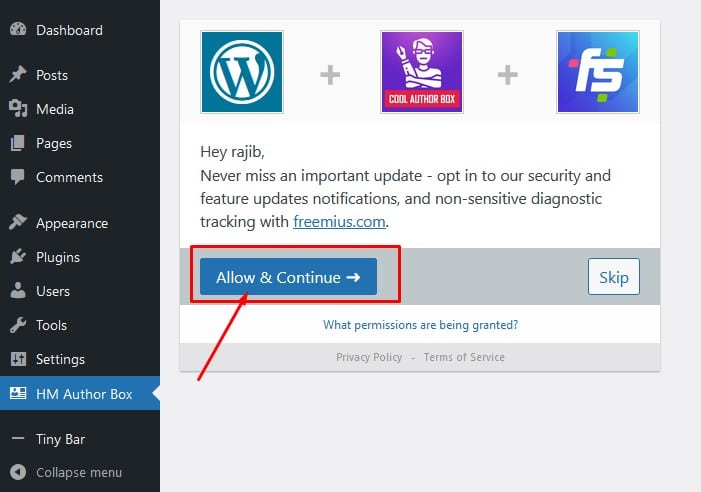
Here, you can see an option to activate the freemius service while using the CoolAuthorBox plugin in WordPress. By clicking on the Allow & Continue button, you get the ability to view and upgrade the premium features of the plugin.
Purchase and Install the Premium Version
To use the premium version, you need to purchase the plugin. And here we present you the steps to do it in this CoolAuthorBox review.
So, you can do so from the website of CoolAuthorBox itself. Or also from the Upgrade option in the Cool Author Box menu of your dashboard if you already installed the free version.
Step 1: Purchase the Plugin
Here, we’re referring to the purchase from the website. So, go through the FAQ menu on the navigation of the website. And then among the pricing plans, choose one. On that chosen pricing plan, click on the Purchase button.
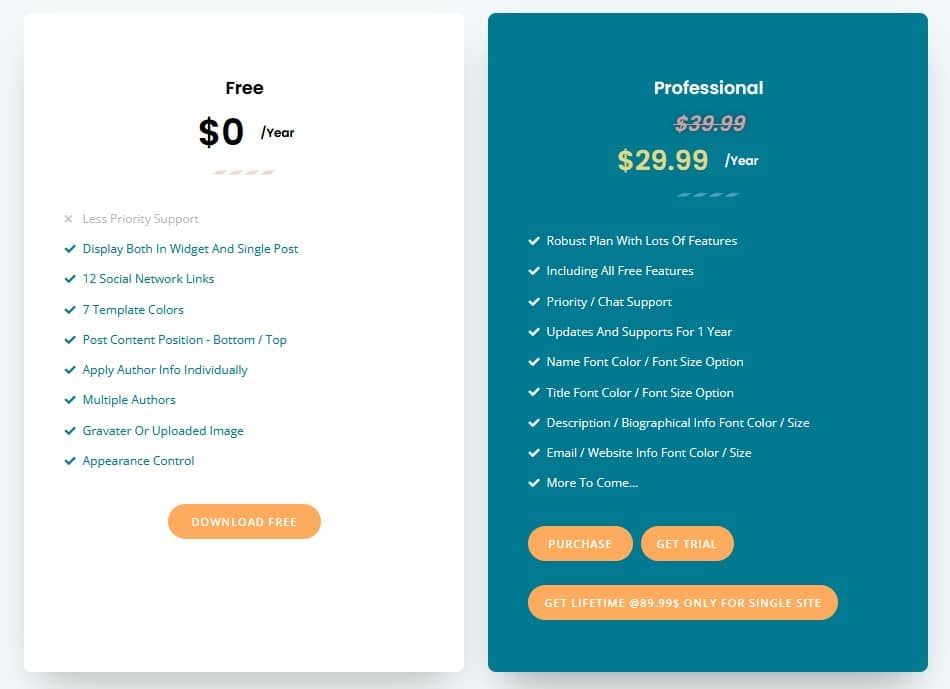
Now, you’ll be redirected to another webpage. There, you can see options to buy Single Site License, 5-Sites License, and 20-Site License on a dropdown menu. Plus, there’s also an Annually and Lifetime access option for each license.
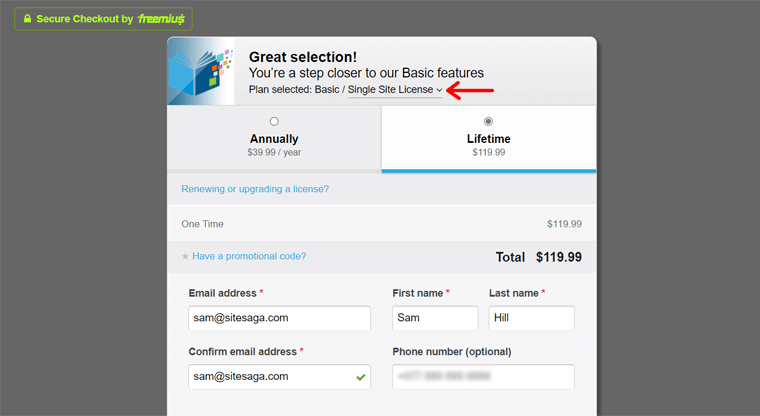
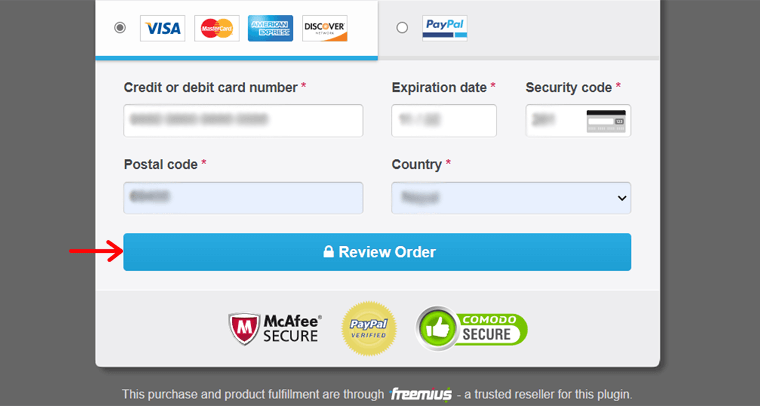
After you choose the license and payment option, you must enter your personal information including your email address on the form. Also, you’ve to fill in the payment information there and click on the Review Order button.
Note that, if you’ve got a promotional code, then you can also enter that.
Once you click on the purchase button, you’ll get an email that contains the download link. So, open that link, and the premium version will get downloaded on your system.
Step 2: Upload, Install and Activate the Premium Plugin
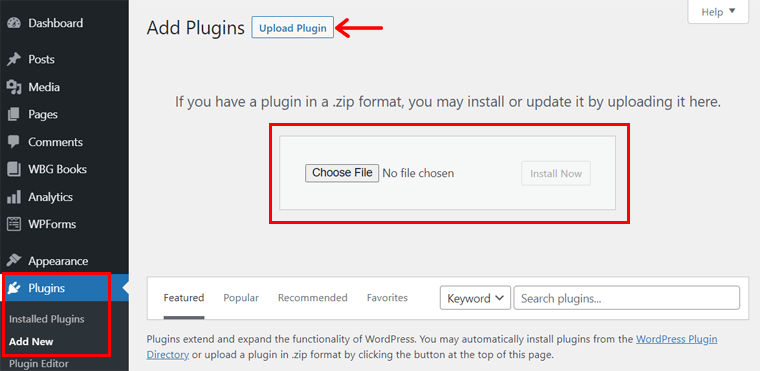
To install the premium version of CoolAuthorBox on your dashboard, you need to first upload the downloaded file. So, go to the Add New option on the Plugins menu of your dashboard.
There, click on the Upload Plugin button and then the Choose File button. Now, upload the downloaded file here and press the Install Now button beside it.
After the installation completes, you can see the Activate link. For the activation, click on it and then, it’ll ask for the license key. So, add your license key and lastly, click on the button Activate.
Once the process completes after a certain time, the plugin gets completely installed and activated on your site.
Don’t forget to configure the settings as in the free version for your premium version as well.